By Simple Home Ideas Editorial
A pantry in a rental home has two jobs: keep food easy to find now and be straightforward to pack up later. The most useful upgrade may be a basket for scattered packets, not another shelf. The right choice depends on what gets lost, what you buy, and what the existing cupboard can support.
This guide compares six solutions you can consider separately. Start with one awkward category, try a change using what you own, and review it after your next ordinary grocery shop. That is when a pantry has to accommodate both open packages and their replacements. Start with one bin for the category that scatters, then add a riser, turntable, or door rack only where it makes retrieval easier.
Before you start: keep the original setup easy to restore
Photograph shelf positions, fittings, and existing damage. Check your rental agreement and clarify permission for changes to doors, shelves, or finishes. Label and retain any fittings you remove. Resolve a loose or sagging shelf before adding storage to it.
Three rules apply throughout: use the exact product's dimensions and load limits; retain its installation and removal instructions; and allow the pantry door to close and latch normally with the intended contents in place. These checks do not need to become a separate project for every loose basket, but they matter whenever hardware or a loaded organizer affects the cupboard.
The six options at a glance
| Solution | Best job | Portability | Buying priority |
|---|---|---|---|
| Handled packet bin | Bring one scattered category to the counter | High - a loose bin can move to another cupboard | Start with a basket you own |
| Freestanding shelf riser | Separate two levels of short items | Medium - reuse depends on the next shelf's height | Buy after measuring the loaded layout |
| Small turntable | Bring hidden bottles to the front | Medium - reuse depends on the next shelf's usable footprint | Buy only where rotation helps |
| Nonadhesive shelf liner | Give small packages a more continuous surface on wire shelves | Low - a cut piece may not fit the next shelf | Consider when the existing surface causes a specific problem |
| Over-door rack | Add a shallow zone to a compatible door | Low - door fit and required fixings vary | Consider after existing shelves work well |
| Backstock tray | Keep unopened replacements visible and bounded | High - usually adaptable to another shelf | Reuse a tray before buying |
Portability scale: High means broadly reusable in another cupboard; Medium means reusable if the next shelf dimensions suit it; Low means strongly dependent on the current shelf or door. This rates ease of reuse, not whether the item can physically be carried.
Spending order: reorganize existing supplies first; reuse a basket or tray next; then buy one accessory for a remaining problem. These are buying priorities, not price comparisons. A rack that needs extra fittings or cannot move with you may cost more overall than its price tag suggests.
01Use a handled bin for a category that scatters
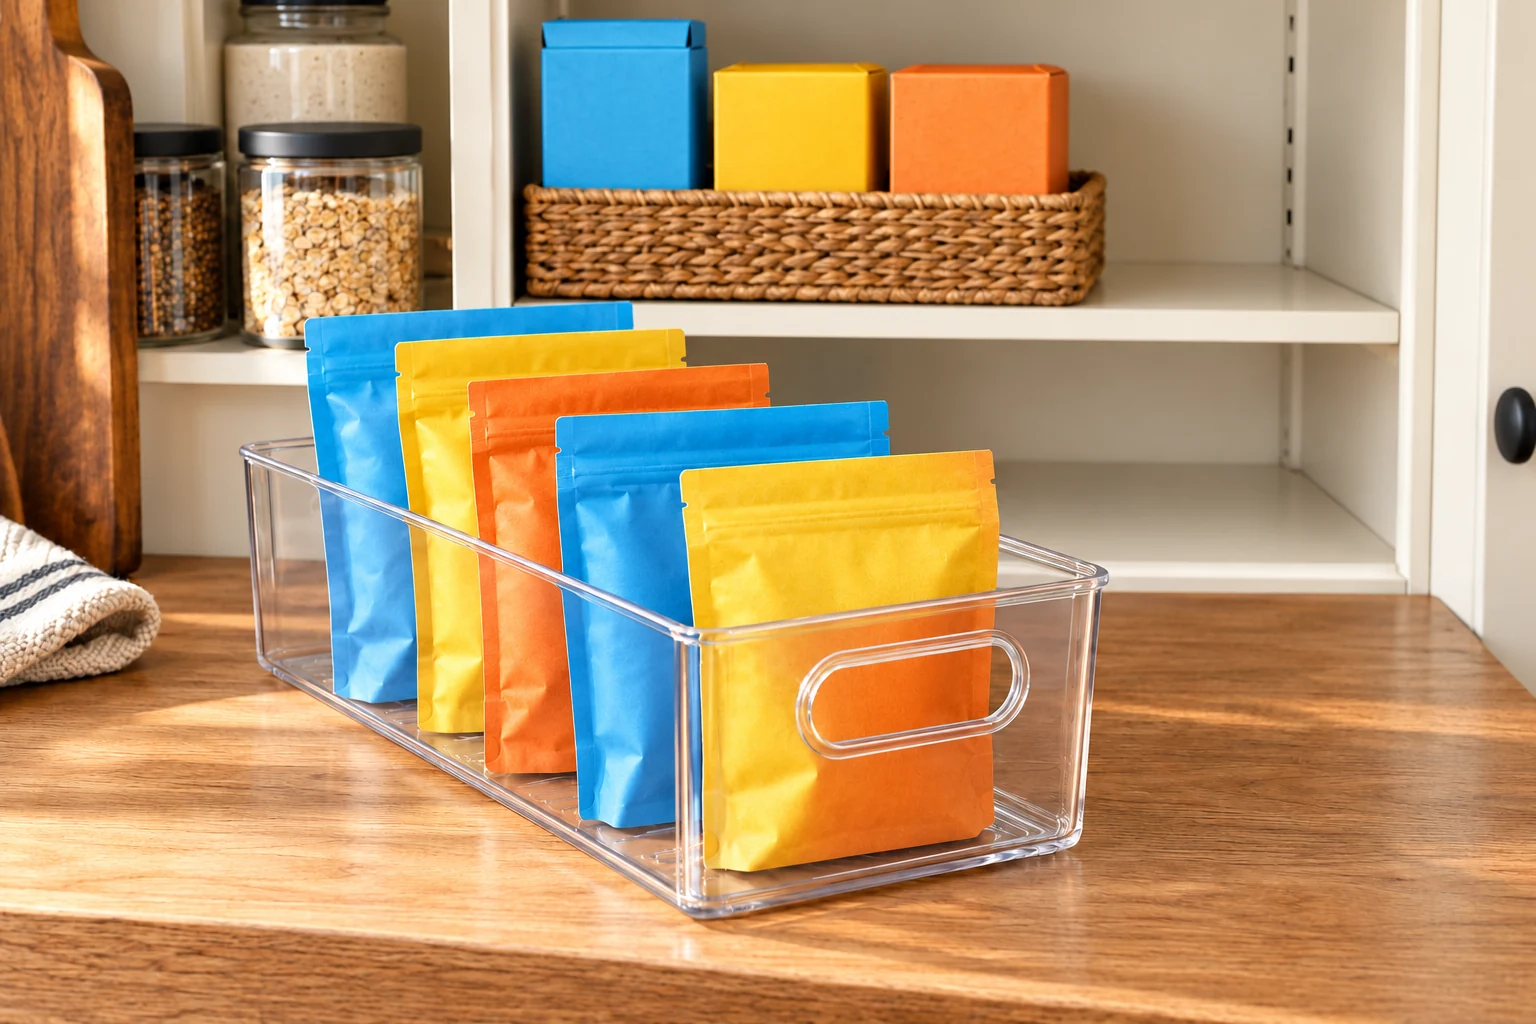
A handled bin works well for loose seasoning sachets, small snack bags, or baking packets. Stand packages with their names visible and group the supplies you retrieve together. Avoid filling one large basket with unrelated categories just to clear the shelf.
Example: put the open breakfast sachets in a shallow bin near the front of the everyday shelf. Leave the unopened box in the backstock area. The bin replaces a row of slipping packets; it does not need to contain the entire household's breakfast supply.
Test with an existing basket first. Carry it to the counter, remove one item, and put it back. If it feels awkward when loaded, split the category or use a smaller tray. A deep container that hides the packets has not solved the visibility problem.
Portability: High. A loose bin can often serve a different cupboard, although its next job may change.
02Add a riser where short items leave usable height
A shelf riser can give short jars or small cans a second level without changing the cabinet. It helps when you can reach both levels comfortably; it adds friction when the lower items become trapped behind supports or tall packages.
Illustrative layout, not a measured installation: suppose the usable shelf height is 30 cm (about 11.8 in). A riser platform sits 12 cm (about 4.7 in) above the shelf, and a jar on top is 14 cm (about 5.5 in) tall. In centimetres: 12 + 14 = 26 cm (about 10.2 in), leaving 30 - 26 = 4 cm (about 1.6 in) above it. Use one unit for the calculation; the inch equivalents are rounded. That arithmetic describes the remaining space, not a passing fit result: you still need to remove the jar comfortably and confirm the lower clearance, platform thickness, support positions, and permitted loads.
The good result is two accessible rows, not the maximum possible number of jars. Keep the category smaller if retrieving one item means unloading the riser.
For a full measurement sequence, see our kitchen cabinet organizer guide.
Portability: Medium, provided the next shelf has enough usable height and a suitable supporting surface.
03Put a small turntable in a reachable corner
A turntable is useful when bottles at the back disappear from view but the front edge remains easy to reach. Group bottles you use together, such as cooking oils and sauces, rather than using the tray as a miscellaneous overflow zone.
Example: move a cluster of small bottles from behind a tall cereal box onto a turntable at one side of the everyday cooking shelf. Keep the cereal box elsewhere so it does not block rotation. The improvement is that each bottle can come to the front without moving the rest of the category.
Check the loaded arrangement, including bottle tops and handles. A tray can rotate empty and still hit the wall or shelf above once filled. If a rectangular tray lets you retrieve the same bottles just as easily and uses the shelf better, choose that simpler option.
Portability: Medium. Its diameter and the loaded bottle heights still have to suit the next cupboard.
04Use a loose liner where wire shelves make small items awkward
Wire shelves can be inconvenient for narrow packages or small containers whose bases do not sit securely across the gaps. A suitable nonadhesive liner can create a more continuous surface and make small spills easier to lift out and clean.
Use a liner compatible with the shelf and its intended conditions. Keep it flat and removable, and dry the shelf and liner after cleaning. A liner does not increase the shelf's load rating or repair bent wire or loose supports.
Example: line only the small-packet zone rather than covering every shelf automatically. Put a narrow packet basket on that section and leave the rest of the surface as it is if it already works. This avoids buying a full roll for a problem confined to one corner.
Keep food in suitable, securely closing packaging or containers. Retain preparation and storage information if you transfer contents. Clean spills and report signs of pests or building defects to the property manager; changing the shelf arrangement alone does not resolve those problems.
Our kitchen storage-container guide explains the different storage jobs in more detail.
Portability: Low. A loose piece travels easily, but one cut tightly to this shelf may not fit the next.
05Use a door rack only when the door supports the plan
An over-door rack can create a shallow zone for wraps, lightweight packets, or similar supplies. It is more dependent on the building than a shelf basket: the mounting brackets must suit the door, the top must clear the frame, and the loaded rack must avoid the shelves when closed.
Example: plan one shallow zone for wrap boxes rather than filling every rack shelf immediately. Compare the exact rack requirements with your door thickness and top gap, then check the space behind the closed door. Do not force the latch or omit required fixings to make the rack appear compatible.
A published specification example: Elfa lists its Classic over-door hook, article 330410, for an interior door 40 mm thick (about 1.57 in) and 2010-2150 mm high (about 79.1-84.6 in), used with a 1980 mm wallband. Its planning guidance also requires room around the door for the hook. Those are requirements for that particular system, not standard dimensions for every pantry door. The cited page does not give a numeric top-gap requirement; obtain that detail for the exact installation rather than guessing. This is a specification example, not a tested recommendation. [3]
Adhesive hooks are a different installation choice. They are not an interchangeable mounting method for a door rack. Command's product guidance specifies suitable surfaces, loads, application, and removal; additional strips do not automatically raise the rated capacity. Keep removal tabs accessible and use a product only for the purpose it permits. “Removable” does not guarantee an undamaged finish on every surface. [1]
Portability: Low. Keep the brackets and instructions, but expect to assess compatibility again at the next home.
06Give backstock one tray with a visible boundary
Backstock is unopened replacement food, not an undefined second pantry. Choose one shelf area or tray and keep it visible before you shop. A label such as “Unopened replacements” helps a shared household distinguish it from the supplies already in use.
Illustrative stock example
- A planned zone accommodates 10 packets of the same size.
- There are 3 left.
- A proposed replacement pack contains 8.
- After purchase: 3 + 8 = 11, which is 1 more than the planned space.
You can choose a smaller pack, delay buying if practical, or reserve a specific overflow position. The useful decision happens before another package arrives. Mixed package sizes need an actual layout check; a packet count is not a universal capacity measurement.
Portability: High. A portable tray can move, and the rule travels too: replacements have one defined home.
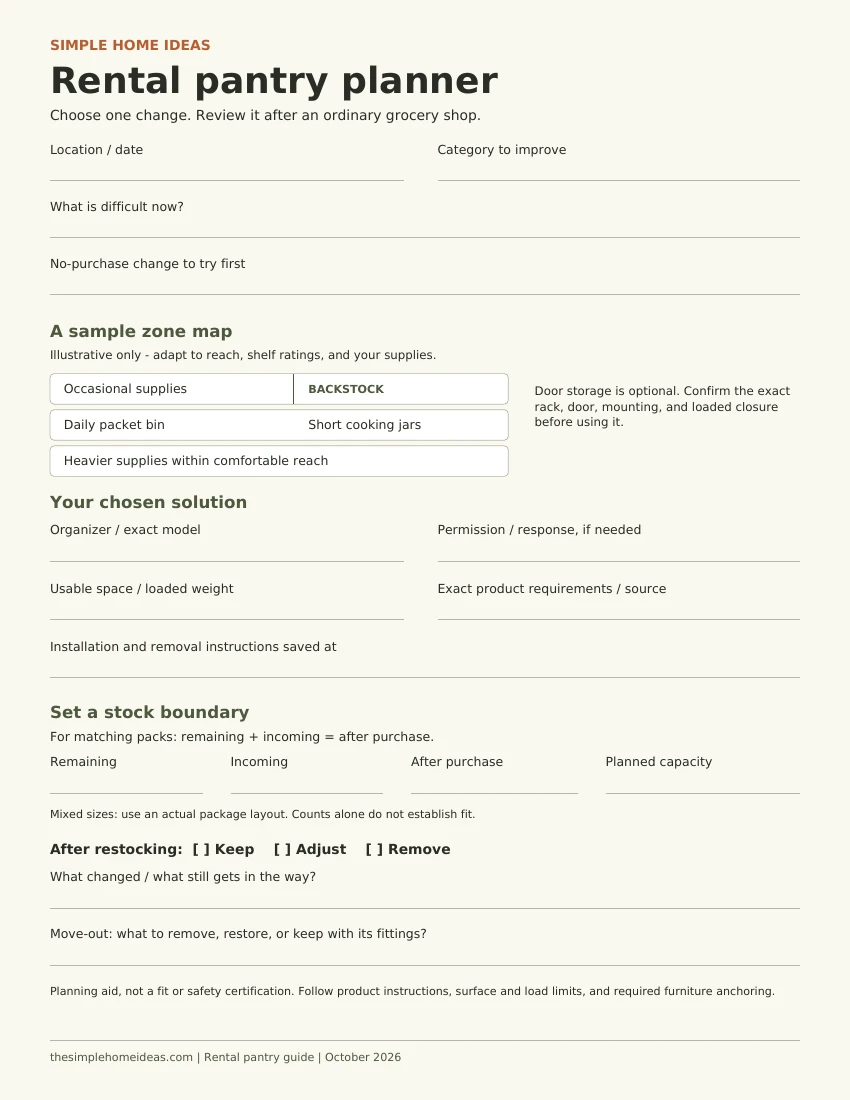
A sample shelf map
This is a planning example, not a record of a tested pantry. Adapt the positions to the people who use the space and the ratings of the existing shelves.
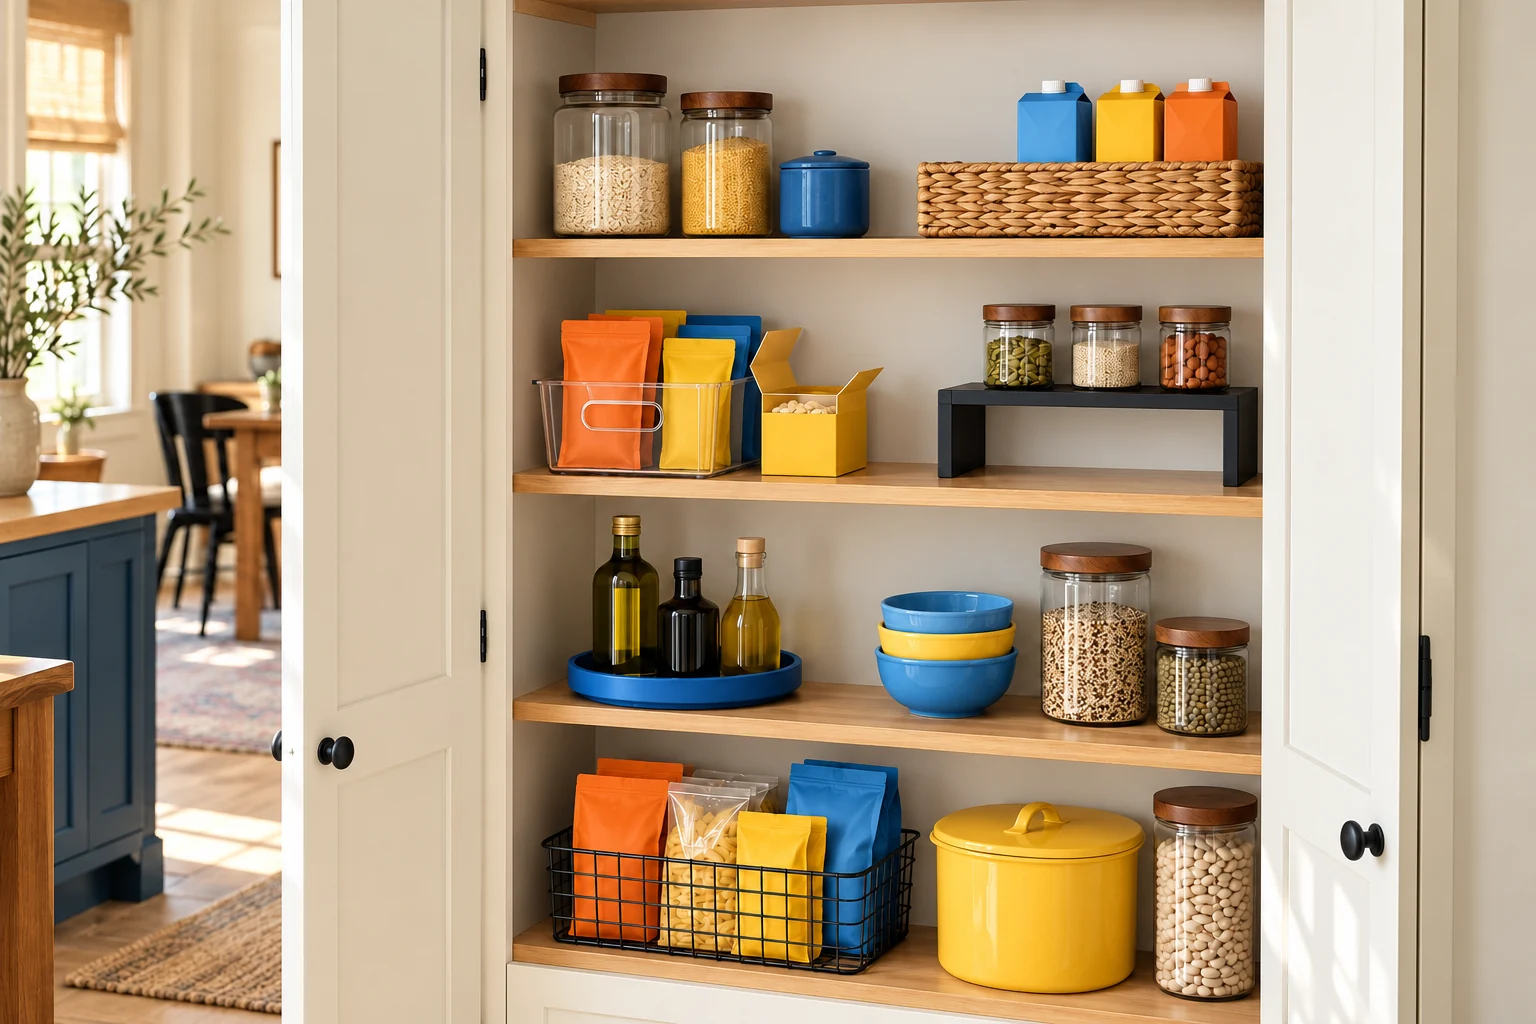
- Upper reachable shelf: occasional lightweight supplies and one clearly marked backstock zone.
- Everyday shelf: breakfast packet bin on one side; short cooking jars on a suitable riser on the other.
- Lower shelf: heavier supplies where they can be handled comfortably.
- Door: optional shallow rack only after compatibility is confirmed.
Keep labels visible and leave enough room to remove and return items. A map is successful when someone can put away groceries without being shown where everything belongs.
If the rental has no pantry shelves
First identify an existing kitchen cupboard that can hold the daily food categories. A portable bin can establish a pantry zone without adding furniture. If extra furniture is genuinely necessary, plan its footprint and installation before buying it. A refrigerator ventilation or servicing gap is not automatically spare storage space.
Freestanding storage is not automatically a safe option without fixings. CPSC's Anchor It campaign recommends anchoring furniture with shelves, drawers, or doors. Follow that guidance and the product's installation requirements; if anchoring is needed and permission is unavailable, choose another approach. [2]
After your next grocery shop: keep, adjust, or remove
Review the pantry when open packages and replacements are both present. Can you see what is already open? Can you lift out one category without disturbing another? Does the door close normally? Is backstock still inside its boundary?
Keep a change that makes these tasks easier. Adjust a category that repeatedly spills onto the counter. Remove an organizer that adds more handling than it saves. You do not need to rebuild the whole pantry because one bin is the wrong size.
Save your plan
Download the accompanying Rental Pantry Planner (PDF, one page) to record the problem, chosen solution, relevant measurements, stock boundary, and restoration steps. Bring the measurements when comparing products; the final keep/adjust/remove field records your decision.
The planner is a planning aid. Record the exact product requirements; a completed form does not certify a safe installation or guarantee a fit.
When you move: a short restoration checklist
- Empty, clean, and pack loose bins, trays, risers, and turntables.
- Check whether cut liners are worth keeping for another shelf.
- Remove attached accessories using their specific instructions.
- Reinstall retained fittings in their recorded positions where appropriate.
- Compare the original setup photos and raise unresolved repair questions with the property manager.
- Keep door-rack brackets and instructions together for the next compatibility check.
A smaller system that works throughout the week is more useful than a full set of organizers bought at once. Start with the category that causes the most friction, give it a clear home, and let the next restock show whether the change earned its place.
How this guide was prepared
Prepared by Simple Home Ideas Editorial using product-use guidance and furniture-safety information from the sources below. The shelf dimensions, stock calculation, and zone map are illustrative planning examples. They are not results from a tested pantry installation.
Sources
[1] Command Brand, Product FAQs. Surface suitability, loading, application, and removal vary by product. Consult the instructions for the exact product. Checked October 21, 2026. Read the source
[2] U.S. Consumer Product Safety Commission, Anchor It. Furniture tip-over prevention and anchoring guidance. Checked October 21, 2026. Read the source
[3] Elfa, Classic over-door hook white, article 330410. Product-specific door dimensions, wallband requirement, and clearance guidance. Checked October 21, 2026. Read the source